This month’s team meeting was last week and it was my turn
to do the demo. I like to try and find something others may not have seen and
use products in another way.
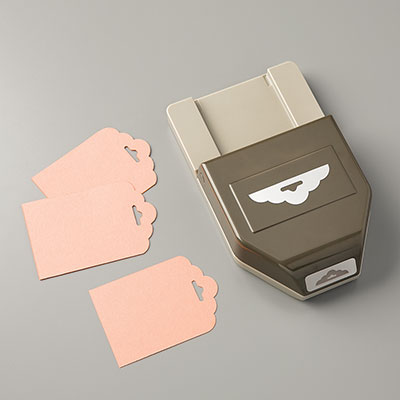
So as I wanted to use a new product and one of my favourites
is the scalloped tag topper punch I tried to find an unusual use.
I found a little treat box that uses the tag topper to
create a really nice decorative look to the box.
It is quite simple to make see the instructions below.
Thanks
Crafty Page
Instructions
- Start a piece of
cardstock 21cm wide by 16cm long
- Score landscape at
5cm, 10cm, 15cm and 20cm
- Score portrait at
5cm and 11cm
- Bone fold all
score lines
- Have the sheet
landscape cut up the vertical score lines to the horizontal line
- Flip the card
and do the same to the other side – cut up the vertical score lines to meet the
horizontal
- There will be
small flaps on one end. Cut these two off so you just have the small flap in
the middle, cut the corners off this flap
- On one edge put
each of the four flaps into the punch as far as it will go and punch.
- Put glue on the
flap fold the box around and glue
- Fold up the flaps
on the bottom and glue to each other to form the bottom
- Decorate and fill
as you wish
Shopping List